Introduction
Making a leather bracelet is a fun and rewarding DIY project that can be completed in just a few hours. Whether you’re looking to create a personalized accessory for yourself or a thoughtful gift for someone special, this guide will walk you through the entire process of how to make a leather bracelet. From selecting the right materials to adding the final touches, you’ll find everything you need to know here.
Why Make a Leather Bracelet?
Personalization: Creating your own leather bracelet allows you to personalize it with unique designs, engravings, or embellishments that reflect your style or the recipient’s personality.
Quality and Durability: By choosing high-quality materials and crafting the bracelet yourself, you can ensure that it is both durable and long-lasting.
Cost-Effective: Making a leather bracelet at home can be more cost-effective than buying one from a store, especially if you plan to make multiple bracelets.
Creative Outlet: This project provides a creative outlet, allowing you to express your artistic side and experiment with different designs and techniques.
What You Will Learn
Material Selection: How to make a leather bracelet? We will guide you through the process of selecting the right type of leather, tools, and additional materials such as clasps, beads, and thread.
Step-by-Step Instructions: Detailed, easy-to-follow instructions will help you cut, shape, and assemble your bracelet.
Design Tips: Learn how to add personal touches, such as engraving, embossing, or adding decorative elements like studs or charms.
Finishing Touches: Discover how to finish and condition your leather bracelet to give it a professional look and feel.
Troubleshooting Common Issues: Get tips on how to avoid common mistakes and solve any problems that may arise during the process.
Who Can Benefit from This Guide
Beginners: If you are new to leather working, this guide will provide a clear and comprehensive introduction to the craft.
Experienced Crafters: Even if you have some experience with leather working, you may find new techniques and ideas to enhance your skills.
Gift-Givers: If you are looking for a meaningful and handmade gift, this guide will help you create a beautiful and personalized leather bracelet.
DIY Enthusiasts: For those who enjoy DIY projects, this guide offers a satisfying and enjoyable way to spend a few hours.
Getting Started
Before you begin, gather all the necessary materials and tools. A well-organized workspace and a bit of patience will go a long way in ensuring a successful and enjoyable project. Follow along with each step, and don’t hesitate to experiment and add your own creative touches. By the end, you’ll have a beautifully crafted leather bracelet that you can be proud of.

Whether you are making a leather bracelet for yourself or as a gift, this guide will provide you with the knowledge and inspiration to create a unique and stylish accessory. Let’s get started!
Understanding the Basics of Leather Bracelets
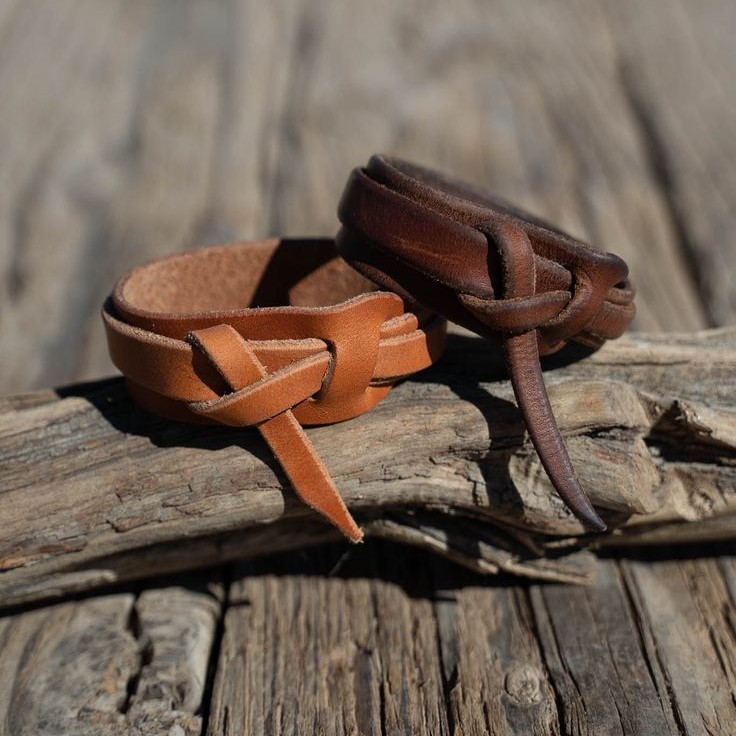
Before diving into the crafting process, it’s important to understand the basics of leather bracelets. Leather bracelets come in various styles, from simple wrap-around bands to more intricate designs with beads and embellishments. The type of leather you choose will also affect the look and feel of your bracelet. Common types include full-grain, top-grain, and genuine leather. Each has its own characteristics, so consider the durability and appearance you want for your bracelet.
Full-grain leather is the highest quality and most durable, but it can be more challenging to work with. Top-grain leather is slightly less durable, but still offers a good balance of quality and ease of use. Genuine leather, while more affordable, may not have the same longevity as the other types. For beginners, starting with top-grain or genuine leather is often recommended.
Gathering the Necessary Materials
To get started, you’ll need a few essential materials. First, select the leather. For beginners, a soft, flexible leather is easier to work with. You’ll also need a ruler, a pencil, a leather hole punch, a leather needle, and waxed thread. Additionally, you might want to have some decorative elements like beads, charms, or studs. These can add a unique touch to your bracelet. Make sure to gather all these items before you begin to ensure a smooth crafting experience.
When choosing your leather, consider the color and texture. Some people prefer a natural, uncolored leather, while others might want a vibrant, dyed leather. If you plan to dye the leather yourself, make sure to do this before cutting and punching holes. This will ensure an even and consistent color throughout the bracelet.
Choosing the Right Tools
The right tools are crucial for a successful leather bracelet project. A sharp knife or leather shears will help you cut the leather precisely. A leather hole punch is necessary for creating holes for the thread or any additional decorations. A leather needle and waxed thread are essential for sewing the bracelet together. If you plan to add snaps or a buckle, you’ll need a snap setting tool and a small hammer. Having these tools on hand will make the process much easier and more enjoyable.
Additionally, a leather edge beveler can be useful for smoothing the edges of the leather, giving your bracelet a more professional finish. A burnishing tool can also help to seal and polish the edges, making them smoother and more durable. These extra tools, while not strictly necessary, can significantly enhance the overall quality of your bracelet.
Measuring and Cutting the Leather
Once you have all your materials and tools, the next step is to measure and cut the leather. Use a ruler to measure the length and width of the bracelet. For a standard wrist size, a length of 8-10 inches and a width of 0.5-1 inch is a good starting point. Mark these measurements on the leather with a pencil, and then use your leather shears or knife to cut along the lines. Be sure to cut slowly and carefully to avoid any mistakes.
If you’re making a wrap-around bracelet, you may need a longer piece of leather. Measure around your wrist and add a few extra inches for overlap. When cutting, it’s always better to err on the side of caution and leave a little extra material, as you can always trim it down later if needed.
Punching Holes and Adding Decorations
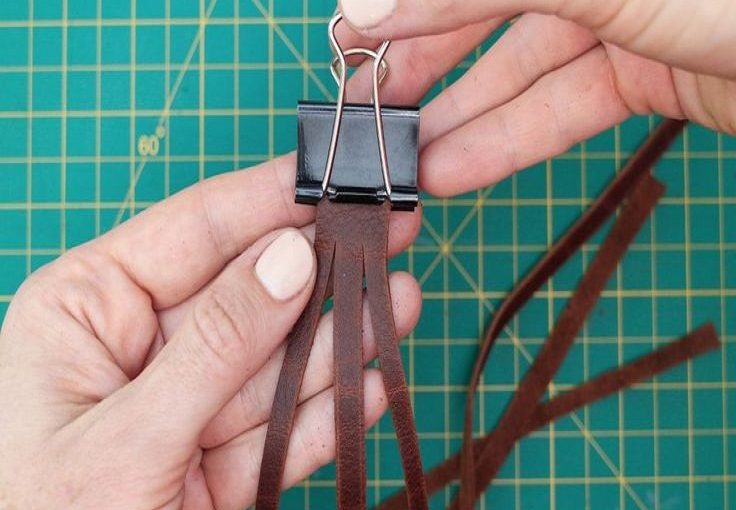
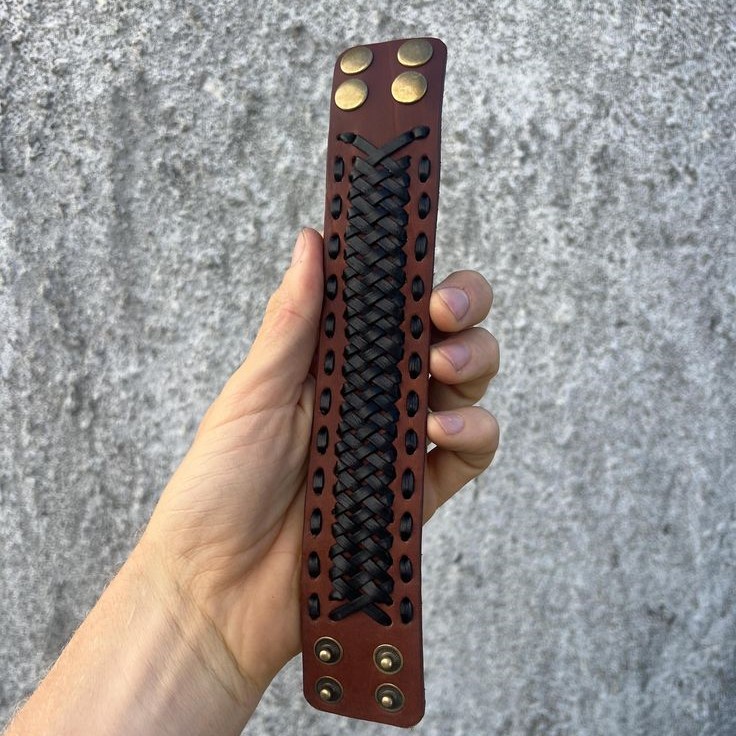
After cutting the leather, it’s time to punch the holes. Use the leather hole punch to create evenly spaced holes along the edges of the leather strip. These holes will be used for sewing and attaching any additional decorations. If you want to add beads or charms, now is the time to do so. Thread them onto the leather strip and secure them in place with a needle and thread. This step allows you to personalize your bracelet and make it truly unique.
For a more intricate design, you can also use a leather stamp to add patterns or text to the surface of the leather. This can be done before or after punching the holes, depending on your preference. Stamping can add a personal touch and make your bracelet stand out even more.
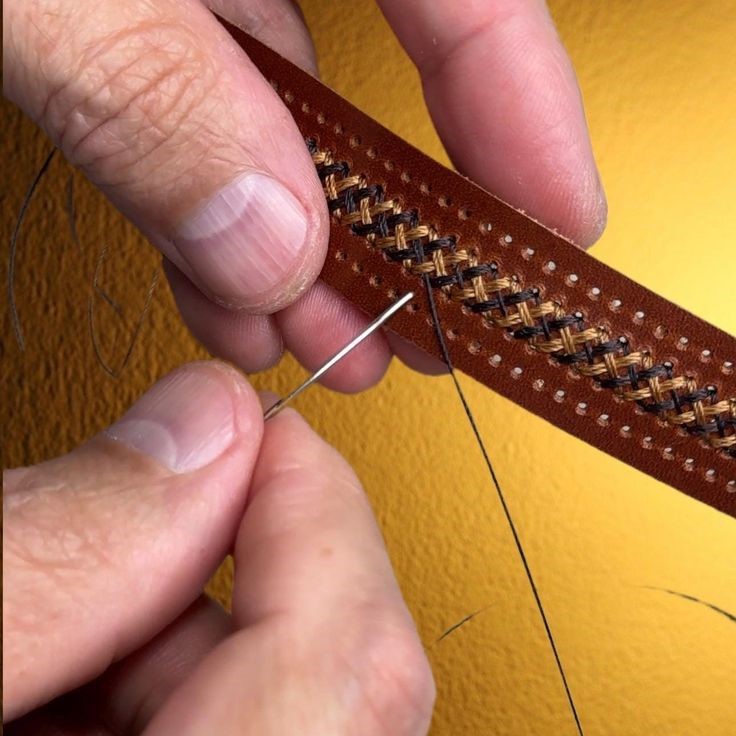
Sewing the Leather Bracelet
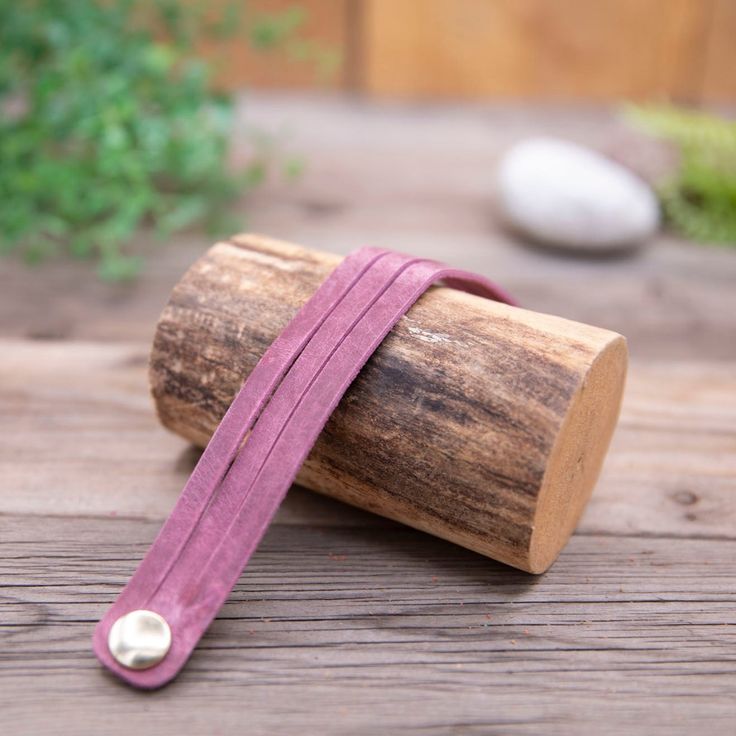
With the holes punched, and any decorations added, you can now sew the leather bracelet. Thread the leather needle with waxed thread and start sewing from one end of the leather strip. Use a simple running stitch, making sure to keep the stitches even and tight. Continue sewing until you reach the other end. Tie off the thread securely and trim any excess. If you’re adding a closure, such as a snap or a buckle, attach it now using the appropriate tools.
If you’re new to sewing, it might be helpful to practice a few stitches on a scrap piece of leather first. This will give you a feel for the tension and spacing of the stitches. Once you’re comfortable, move on to your actual bracelet. Remember to pull the thread taut but not too tight, as this can cause the leather to pucker.
Finishing Touches and Final Thoughts
Once the sewing is complete, take a moment to inspect your leather bracelet. Make sure all the stitches are secure and that the bracelet fits comfortably on your wrist. You can also apply a leather conditioner to protect the leather and give it a nice finish. Making a leather bracelet is a satisfying and creative project that can be enjoyed by both beginners and experienced crafters. With the right materials and tools, you can create a beautiful and durable accessory that you’ll be proud to wear or give as a gift. Remember, practice makes perfect, so don’t be afraid to experiment with different designs and techniques. Happy crafting!
In conclusion, learning how to make a leather bracelet is a rewarding and enjoyable experience. By following this guide, you can create a unique and stylish accessory that reflects your personal style. Whether you’re a beginner or an experienced crafter, the steps outlined here will help you achieve a professional-looking result. So, gather your materials, pick up your tools, and start creating your very own leather bracelet today.