Introduction
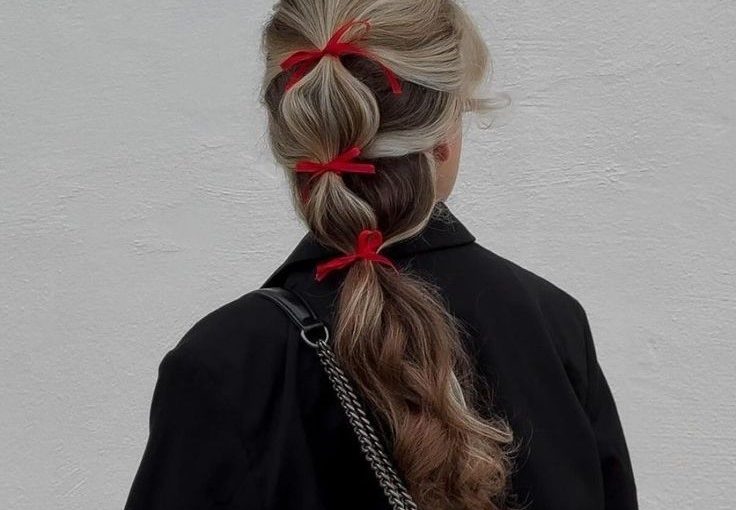
Tying a hair bow is a simple yet elegant way to add a touch of style to your hairstyle. Whether you’re dressing up for a special occasion or just want to look put together, knowing how to tie a hair bow can be a handy skill. In this quick guide, we will show you how to tie a hair bow in under 5 minutes. By the end, you’ll be able to create a beautiful hair bow that complements any outfit. Let’s get started!
The Elegance of a Hair Bow
Versatility: A hair bow is a versatile accessory that can elevate any hairstyle, whether you have long, short, straight, or curly hair.
Special Occasions: For formal events like weddings, proms, or parties, a hair bow can add a touch of sophistication and elegance.
Everyday Style: Even on casual days, a hair bow can make you feel more put together and stylish, whether you’re running errands or meeting friends.
Why Learn to Tie a Hair Bow?
Practical Skill: Knowing how to tie a hair bow is a practical skill that can come in handy for various occasions. It’s a quick and easy way to enhance your look without much effort.
Cost-Effective: Instead of buying pre-made hair bows, you can use ribbons or fabric scraps to create your own, saving money and adding a personal touch.
Customization: You can choose the color, size, and material of your hair bow to match your outfit and personal style, making it a truly unique accessory.
Materials Needed
Before we dive into the steps, let’s make sure you have everything you need. To tie a hair bow, you will require the following materials:
- A ribbon (preferably satin or grosgrain)
- A hair elastic or a small hair clip
- Scissors (if you need to cut the ribbon)
- A comb or brush to smooth out your hair
- Optional: decorative elements like beads or sequins
Choosing the Right Ribbon
The type of ribbon you choose can significantly affect the final look of your hair bow. Then, satin ribbons are smooth and shiny, making them perfect for formal occasions. Grosgrain ribbons, on the other hand, have a more textured surface and are great for a casual, everyday look. Consider the color and width of the ribbon as well. A wider ribbon will create a larger, more dramatic bow, while a narrower ribbon will result in a more delicate and subtle look.
Step 1: Prepare Your Hair
The first step is to prepare your hair. Start by brushing it to remove any tangles. Once you have done this, if you have long hair, you might want to gather it into a ponytail or a half-up, half-down style. This will not only make it easier to attach the bow but also ensure that your hair is neatly arranged. On the other hand, for shorter hair, you can simply smooth it back or create a small section where you want to place the bow. By following these steps, you will have a well-prepared base for adding your decorative hair bow.
Tips for Different Hair Types
- Long Hair: Firstly, gather your hair into a high or low ponytail, depending on where you want the bow to sit. Use a hair elastic to secure the ponytail.
- Short Hair: Then, smooth your hair back and use a small hair clip to create a section where you will attach the bow. This works well for bobs or pixie cuts.
- Curly Hair: Last, use a wide-tooth comb to gently detangle your curls. You can gather your hair into a loose ponytail or leave it down and attach the bow to a specific section.
Step 2: Cut and Fold the Ribbon
Next, cut a piece of ribbon to the desired length. A good starting point is about 18 inches, but you can adjust based on the size of the bow you want. Once you have your ribbon, fold it in half to find the center. This will help you create a symmetrical bow.
Measuring the Ribbon
To ensure you have enough ribbon, measure the length from one ear to the other, passing over the top of your head. Add a few extra inches for the loops and the tails. This will give you a good estimate of the length you need.
Step 3: Create the First Loop
Now, it’s time to start forming the bow. Take one end of the ribbon and fold it over to create a loop. Hold the loop in place with your fingers. The size of the loop will determine the overall size of the bow, so make sure it’s not too big or too small. You can adjust the size as needed.
Adjusting the Loop Size
- Small Bow: Keep the loops small and close to the center.
- Large Bow: Make the loops larger and spread them out. This will create a more dramatic look.
Step 4: Create the Second Loop
With the first loop in place, take the other end of the ribbon and fold it over to create a second loop. This second loop should mirror the first one. Next, hold both loops together at the center. While doing this, make sure the loops are even and symmetrical. If they are not, you can adjust them now before moving on to the next step. Once the loops are even, you are ready to proceed.
Ensuring Symmetry
To ensure symmetry, hold the two loops together and compare their sizes. If one loop is larger than the other, adjust the folds until they are even. This will give your bow a balanced and polished look.
Step 5: Secure the Center
To secure the center of the bow, use the remaining part of the ribbon to wrap around the middle where the two loops meet. You can either tie a knot or use a small piece of clear tape to hold it in place. Alternatively, you can use a small hair elastic or a piece of thread to secure the center. This will ensure that the bow stays in place and looks neat.
Securing Methods
- Knot: Tie a tight knot in the center of the bow. This is the most straightforward method.
- Elastic: Wrap a small hair elastic around the center and tuck the ends under the bow.
- Thread: Use a needle and thread to sew the center securely. This method is more durable but requires some sewing skills.
Step 6: Attach the Bow to Your Hair
Once the bow is secured, it’s time to attach it to your hair. If you have a ponytail, simply tie the ribbon around the base of the ponytail. Alternatively, for a half-up, half-down style, you can attach the bow to the top of the gathered section. For short hair, on the other hand, you can use a small hair clip to attach the bow to the desired spot. Finally, make sure the bow is centered and securely attached. After ensuring everything is in place, you can be confident that your hair bow will stay put and look great.

Placement Tips
- Ponytail: Position the bow at the base of the ponytail, ensuring it is centered and visible.
- Half-Up, Half-Down: Place the bow at the top of the gathered section, slightly off-center, for a playful look.
- Short Hair: Use a small hair clip to attach the bow to the side or back of your head, depending on your preference.
Step 7: Add Finishing Touches
Finally, add any finishing touches to your hair bow. You can trim the ends of the ribbon to make them even or cut them at an angle for a more polished look. If you have any decorative elements, such as beads or sequins, you can attach them to the center of the bow for extra flair. Smooth out any wrinkles in the ribbon and make sure everything is in place.
Decorative Elements
Adding decorative elements to your hair bow can transform a simple accessory into a stunning and personalized piece. Firstly, consider these ideas to enhance the look of your hair bow:
Beads
Sparkly Effect: Firstly, sew or glue small beads to the center of the bow for a sparkly effect. Beads come in a variety of colors, sizes, and shapes, allowing you to create a unique and eye-catching design.
Placement Ideas:
Center: Then, place a cluster of beads at the center of the bow for a focal point.
Edges: Add beads along the edges of the loops for a more subtle, yet elegant touch.
Types of Beads:
Crystal Beads: For a luxurious and glamorous look.
Pearl Beads: For a classic and sophisticated appearance.
Colored Glass Beads: To add a pop of color and vibrancy.
Sequins
Glamorous Touch: Firstly, add sequins to the loops for a glamorous touch. Sequins can catch the light and add a shimmering effect to your hair bow.
Application Methods:
Sewing: Sew sequins onto the fabric for a more secure and long-lasting attachment.
Gluing: Then, use a strong fabric glue to attach sequins if you prefer a quicker method.
Design Ideas:
All-Over Glitter: Cover the entire surface of the bow with sequins for a bold and dazzling look.
Patterned Sequins: Create a pattern or design with sequins, such as stripes, polka dots, or geometric shapes.
Accent Points: Place sequins at strategic points, like the tips of the loops or the center, for a more understated but still glamorous effect.
Flowers
Feminine and Elegant Look: Firstly, attach a small artificial flower to the center of the bow for a feminine and elegant look. Flowers can add a soft and romantic touch to your hairstyle.
Types of Flowers:
Roses: For a classic and timeless look.
Peonies: For a full and lush appearance.
Daisies: For a more casual and playful style.
Attachment Techniques:
Hot Glue: Then, use a hot glue gun to securely attach the flower to the center of the bow.
Sewing: Sew the flower onto the bow for a more durable and seamless look.
Additional Tips:
Color Coordination: Choose a flower that complements the color of your ribbon or the outfit you plan to wear.
Size Consideration: Ensure the flower is proportionate to the size of the bow. A small, delicate flower works well for a smaller bow, while a larger flower can be used for a bigger bow.

Conclusion
Congratulations! You’ve successfully learned how to tie a hair bow in under 5 minutes. With these simple steps, you can create a beautiful and stylish hair accessory that enhances any hairstyle. Whether you’re attending a special event or just want to add a touch of elegance to your everyday look, a hair bow is a perfect choice. Practice makes perfect, so don’t be afraid to experiment with different ribbons and styles. Now that you know how to tie a hair bow, you can enjoy this versatile and charming accessory anytime.